
Introduction
In this article I will briefly show you how to move an object in augmented reality directly with the touch of the device.
The project will be developed with Unity for Android devices with the ARCore and AR Foundation libraries.
Development
To manipulate objects we should in principle create an AR project where we can AR Object Control Tool, available on Github, makes it easy to scale and rotate objects in AR.
Prerequisites
Before starting development is necessary
- import the ARCore and AR Foundation libraries into the project,
- set the build for android devices,
- add to plugin provideres ARCore,
- remove Vulkan from the Graphics API and set the build only for devices with Android starting from version 8,
- and finally you may need to set up a build for arm64 devices (scriptingBackend IL2CPP is required).
Finally, you need to import the package available at the following link into your project: https://github.com/LeoSery/AR-Object-Control-Tool--Unity3DTool/releases/tag/V3.0
Scene setup
As with all AR projects, start by removing the Main Camera.
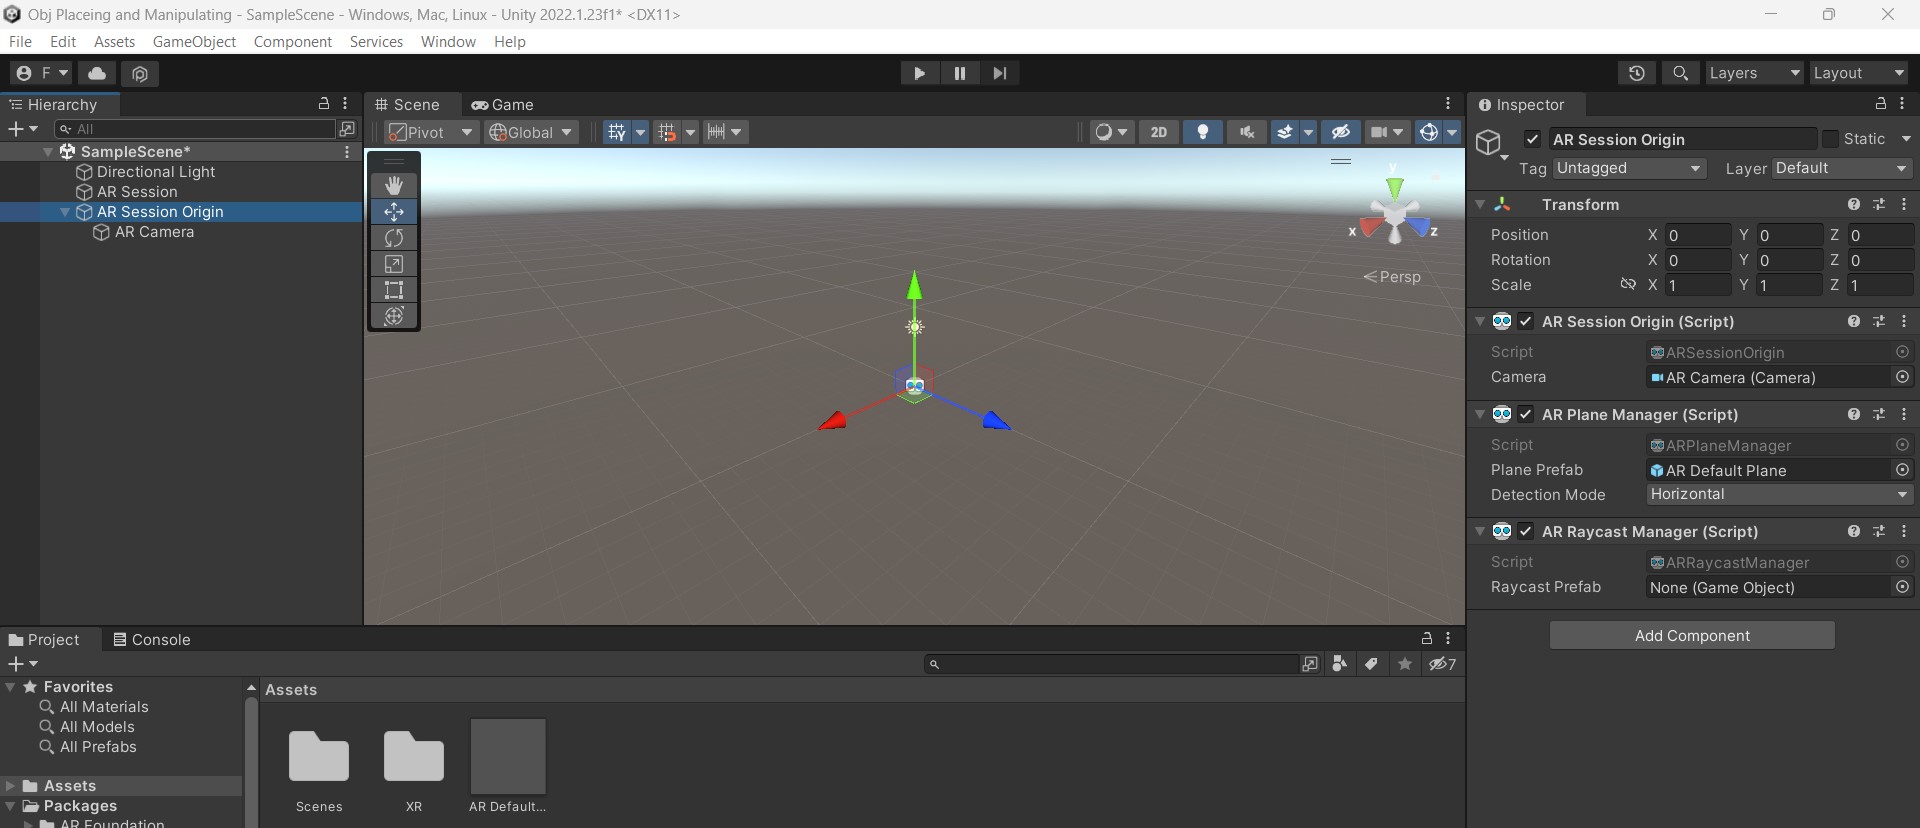
Add XR->AR Session Origin and XR->AR Session to the scene. From the GameObject > XR > menu add AR Session and AR Session Origin to the scene.
To enable plane detection add the AR Plane Manager script to the AR Session Origin object. I also recommend changing the DetectionMode field to Horizontal.
To interact with trackable functionality add the AR Raycast Manager script to the AR Session Origin object.
To display the position of the planes in our AR scene we need a Plane Prefab so that the AR Plane Manager script can display the position of the plane in our AR scene; so let’s add an XR > AR Default Plane into the scene. Drag the newly created object into the project asset to create a prefab with the AR Default Plane and delete it from the Scene Hierarchy.
Add the newly created AR Default Plane to the AR Plane Manager script, as shown in the figure below.
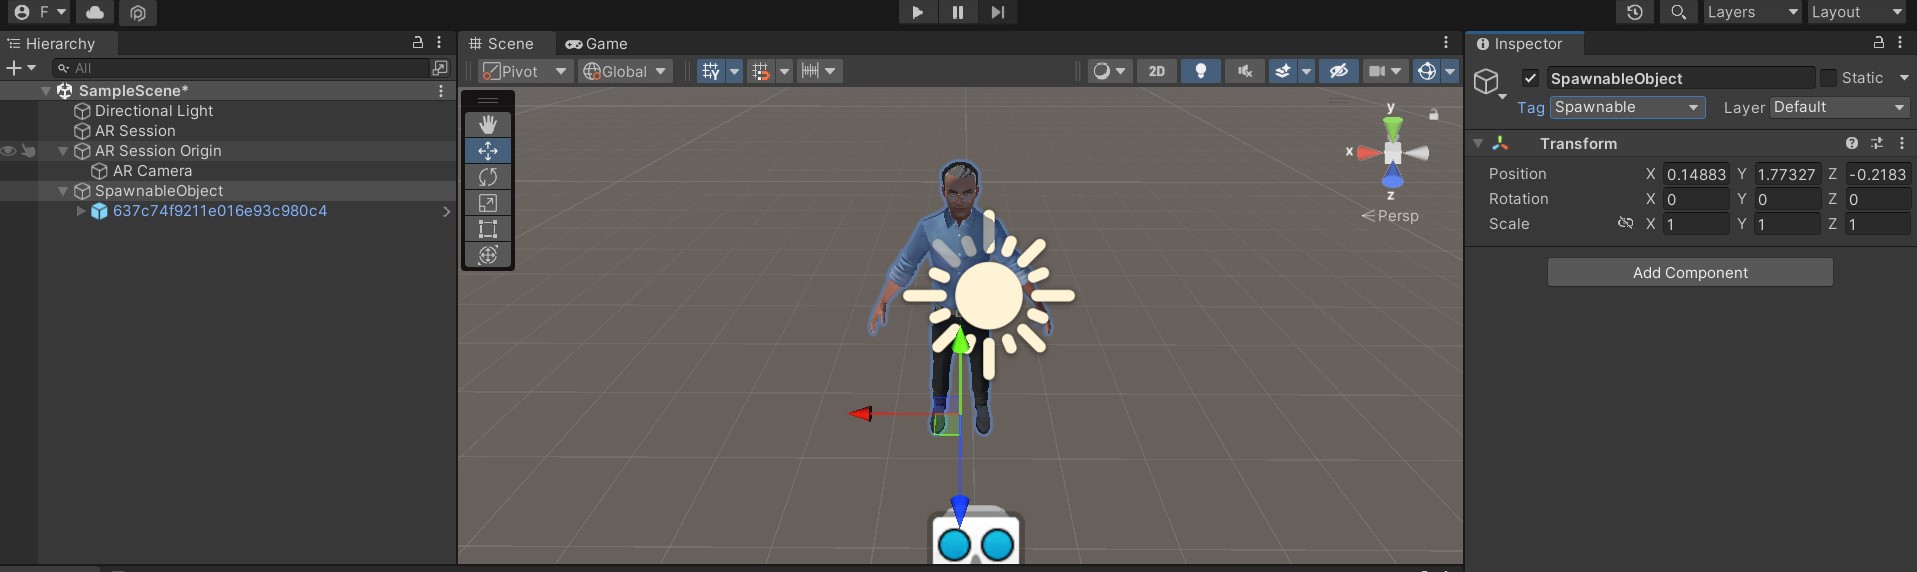
- Now we need an object to appear and then manipulate on the AR environment. To do this we create a cube and call SpawnableObject.
Remember to reduce the scale to 0.1 for each axis to have a good view when aiming the object in AR.
In my example instead of the cube I will use the ReadyPlayerMe avatar, if you want to know how to use the avatar instead of the cube look at this article: https://www.francescogarofalo.it/post/come-creare-un-avatar-personalizzato -and-use-it-in-unity-with-readyplayerme/
Create a Spawnable tag and add it to SpawnableObject.
To make the Spwnable Object appear you need to create a script that takes care of this Spawnable Manager.cs
| |
Create an empty game object in your scene and name it SpawnManager.
Insert the previously created Spawn Manager script into the SpawnManger object.
Add in the script field Spawn Manager.cs Raycast Manager: AR Session Origin and in the field Spawnable Prefab:Spawnable Object.
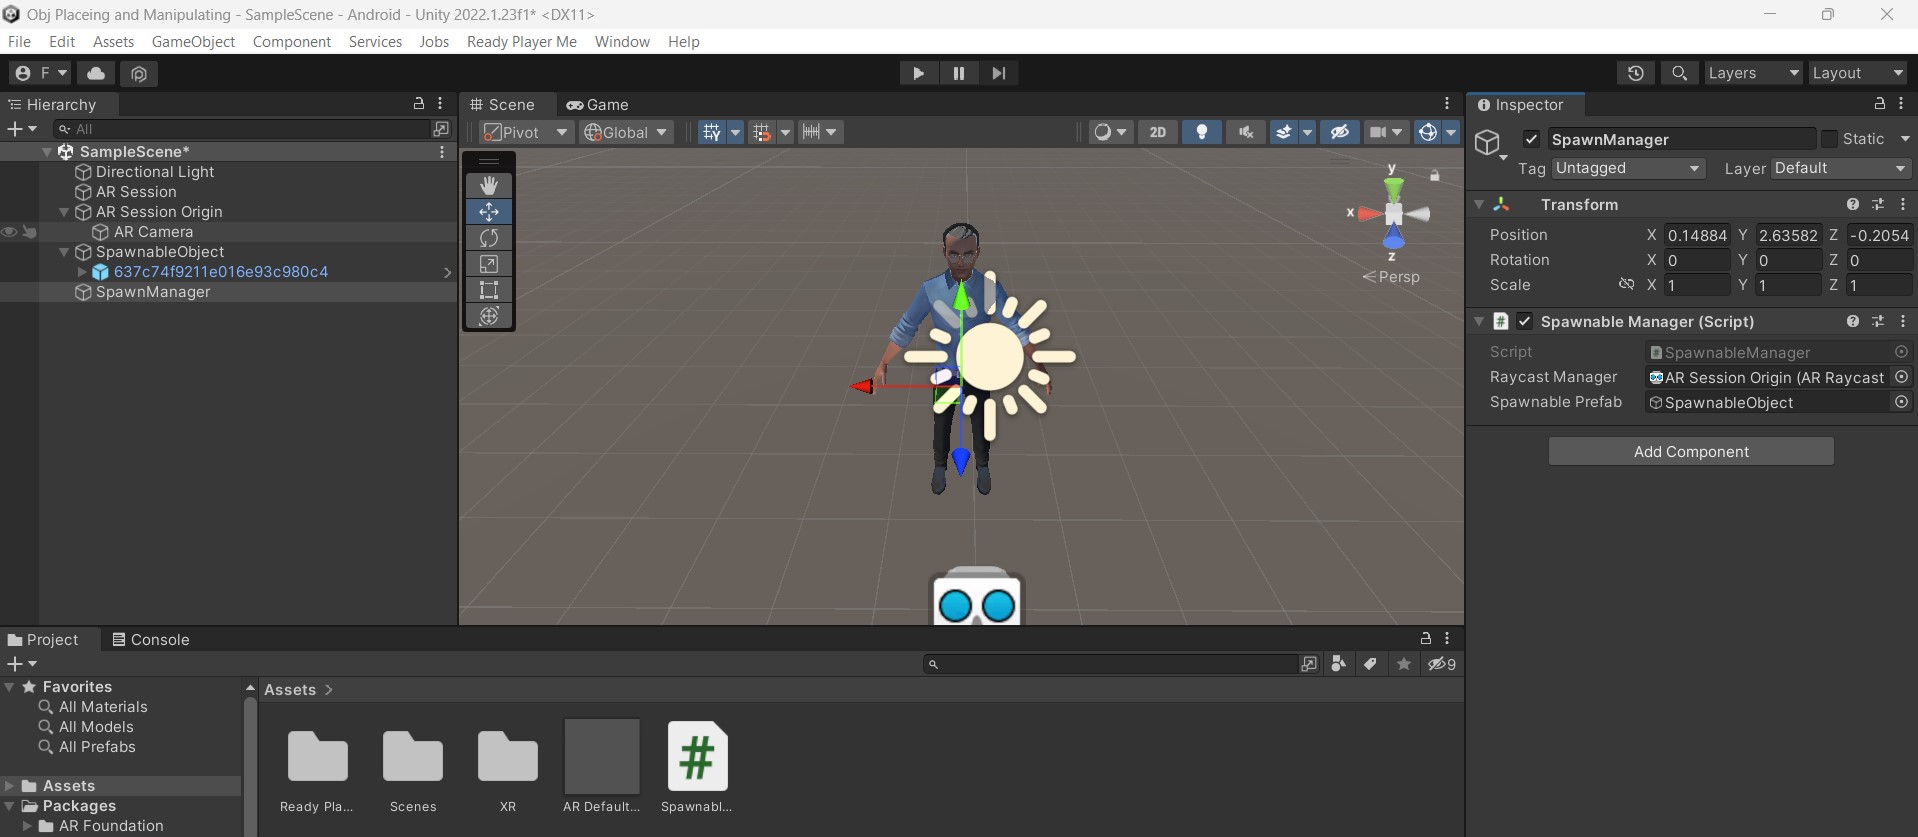
Now you can test that the SpawnableObject is correctly instantiated.
Manipulate the SpawnableObject
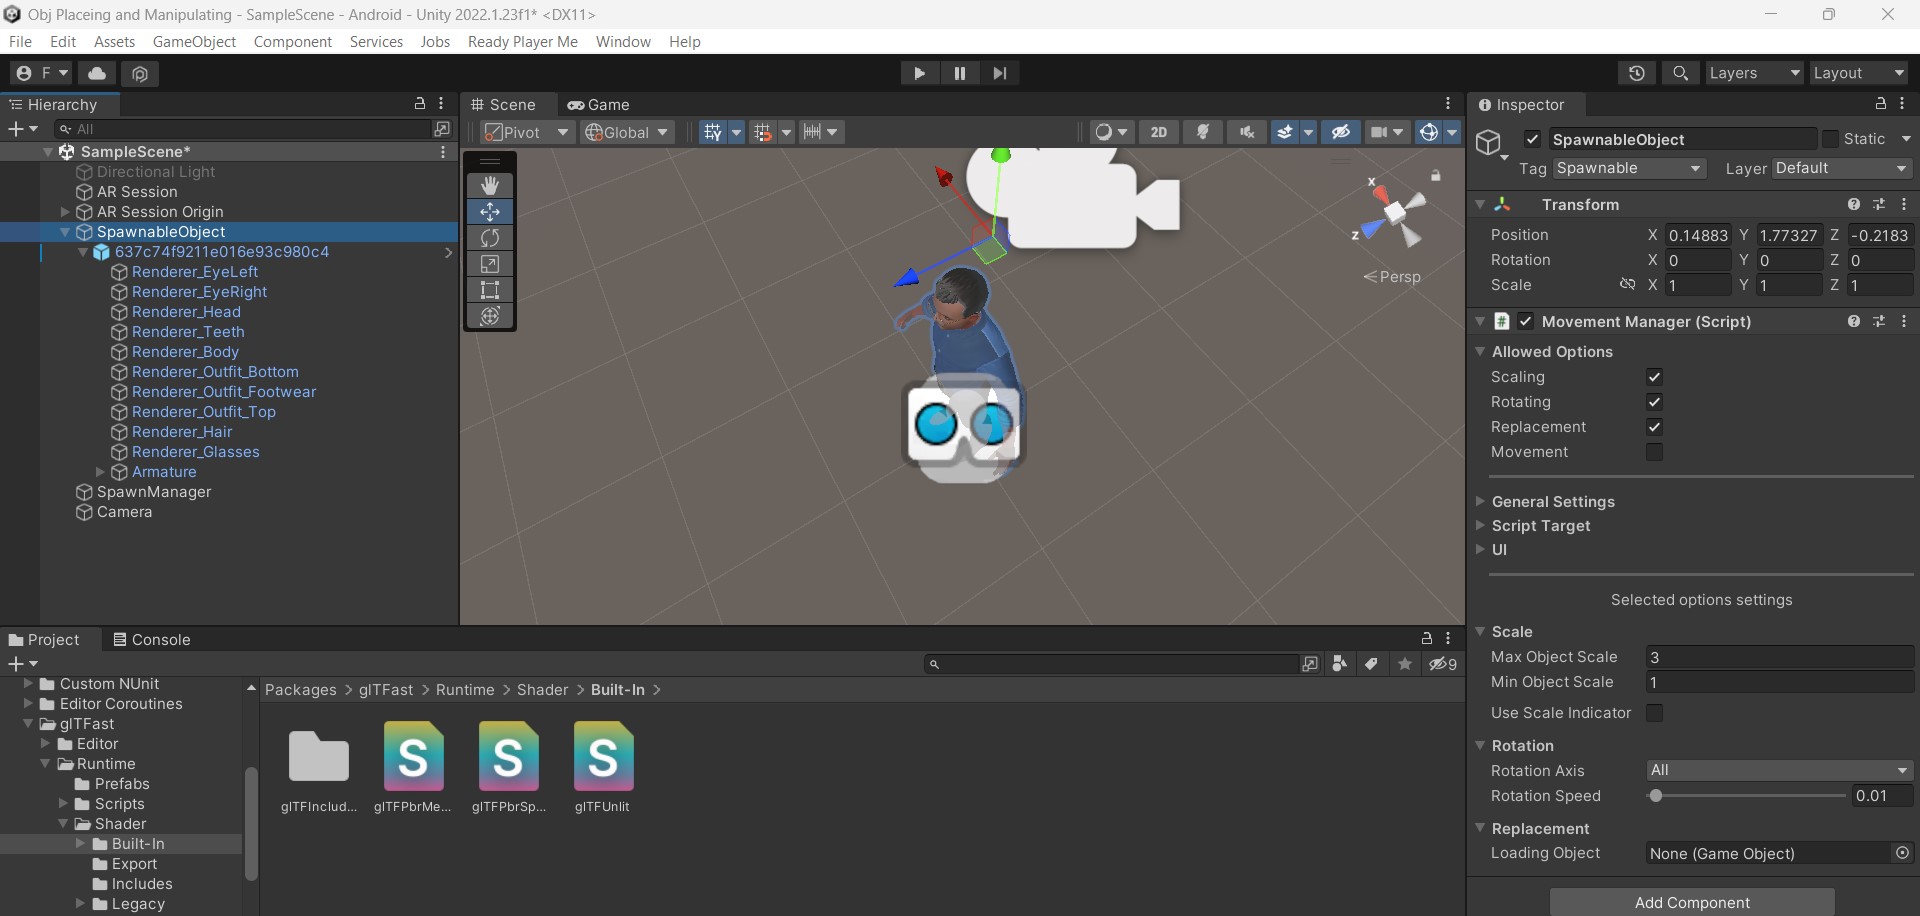
With the AR Object Control Tool package you can easily modify some characteristics of the SpawnableObject, created in the previous steps of this article, in runtime.
Setup
To enable the activities of
- Scaling
- Rotating
- Replacement
- Movement
you can add the Movement Manager.cs script to the Spawnable Object.
By enabling the Scaling, Rotating and Replacing options you can easily manipulate the object in AR.
Conclusion
By adding the MovementManger script to the object we want to manipulate we can easily modify an object in augmented reality at runtime by changing its position, size and rotating it to our liking.
This way we can easily create any type of augmented reality game to try in uncontrolled environments.
Fonti
Thanks :)