In this post we will briefly see how to create a Unity application for Android in Augmented Reality, using ARFoundation and ARCore, in particular how to position objects belonging to the virtual world in the real world, using an image library.
Get Started
To create this application we need:
- Unity Hub ;
- Unity 2020/2021;
- Android Build Support for Unity
Create the AR project
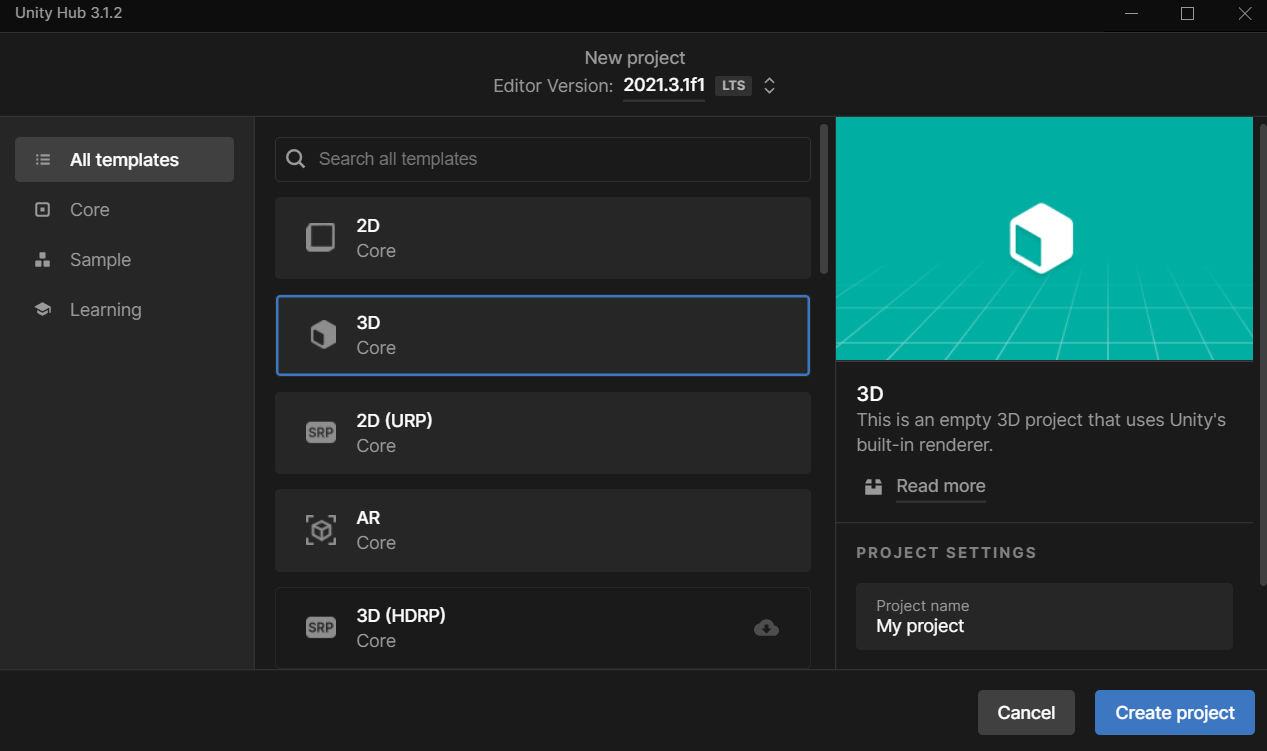
- You can create the project via Unity Hub as a standard 3D project.
Import ARFoundation + ARCore and prepare for the android buld
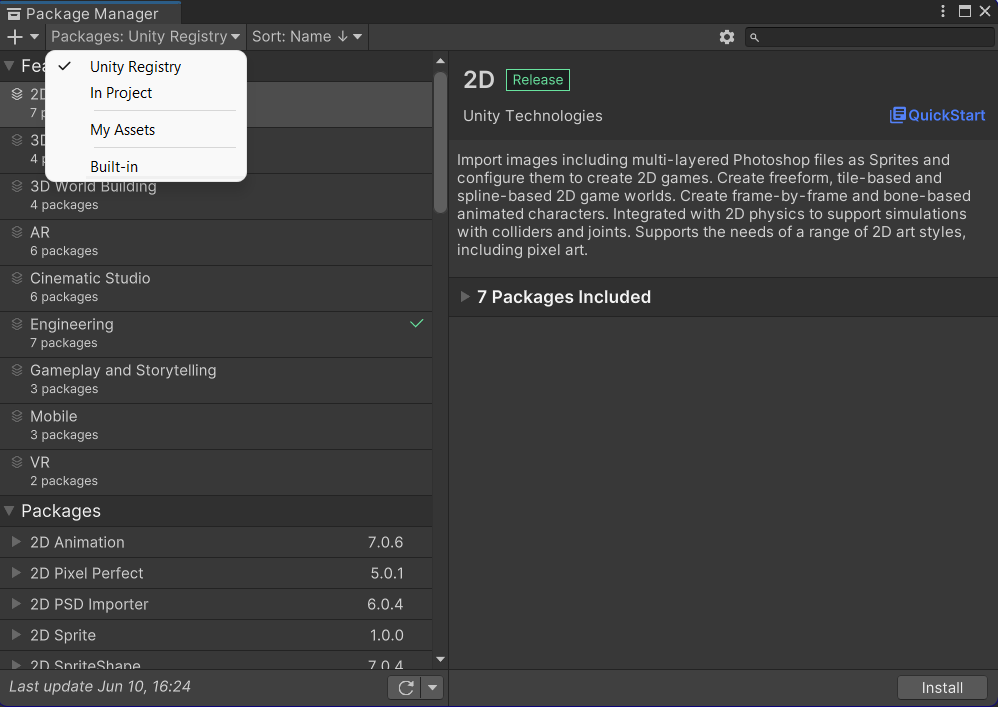
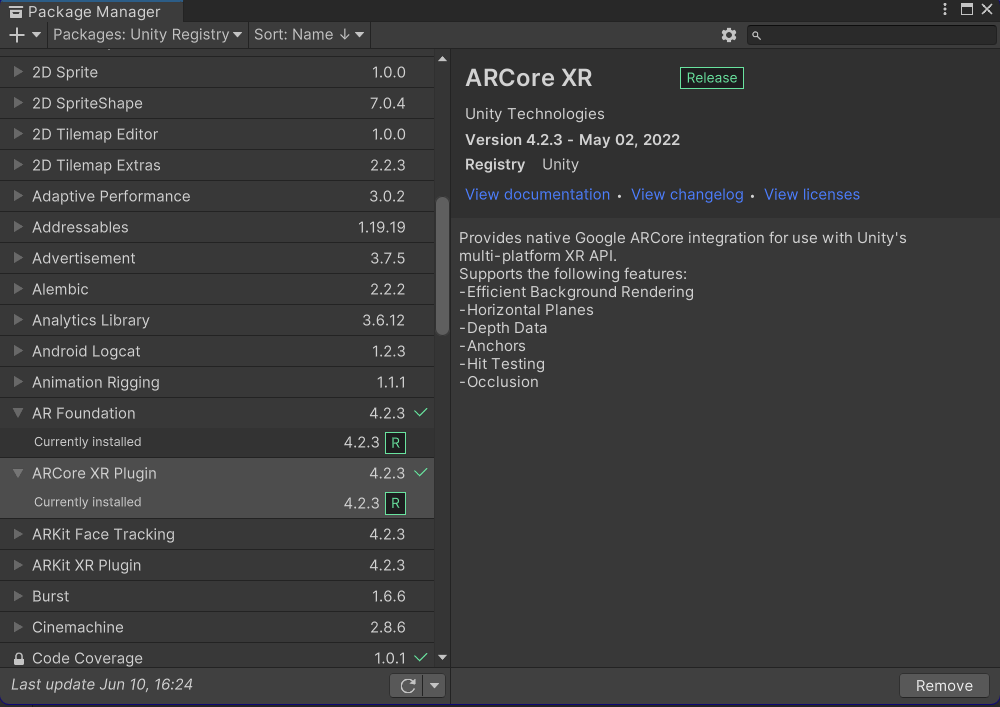
From the unity project created click on Windows -> Package Manager, select Packages: Unity Registry as per image below and install the AR Foundation, ARCore XR Plugin packages.
Now change the build of the project and set it to android; to do this click on File, Build Settings, selezionare Android & click on Switch Platform.
Initialize AR Scene
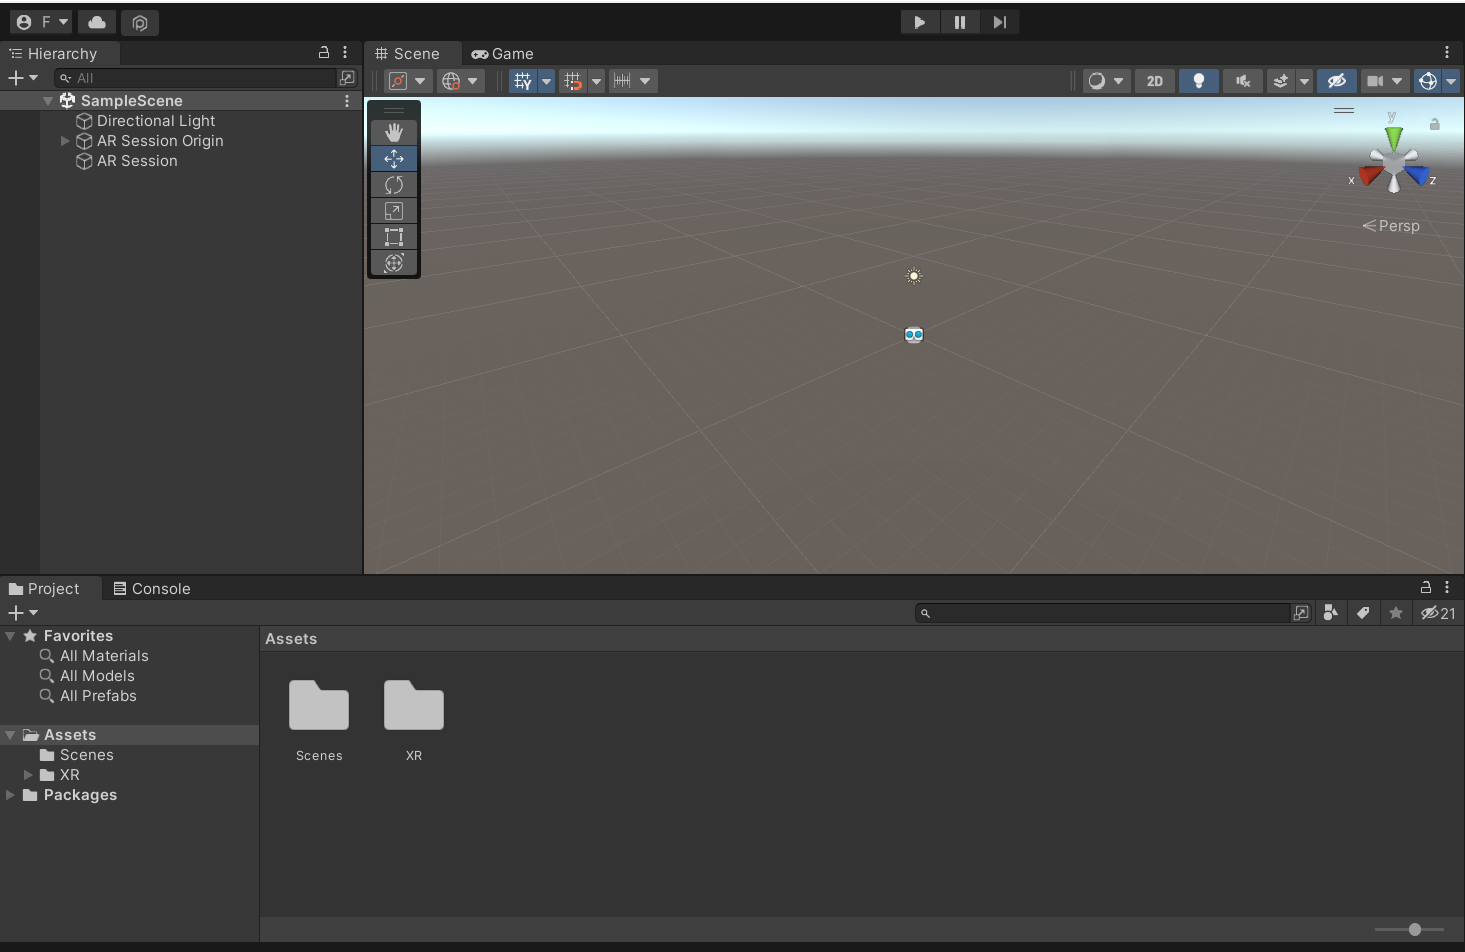
We are now ready to develop our AR project. First we prepare the scene, from the hierarchy panel remove the main camera object existing by default in the project, right click on the hierarchy panel -> XR -> AR Session Origin, click again with the right click on the panel hierarchy -> XR -> AR Session Origin. At this point the project will be in the hierarchy panel like that of the image Import AR Session and AR Session Origin.
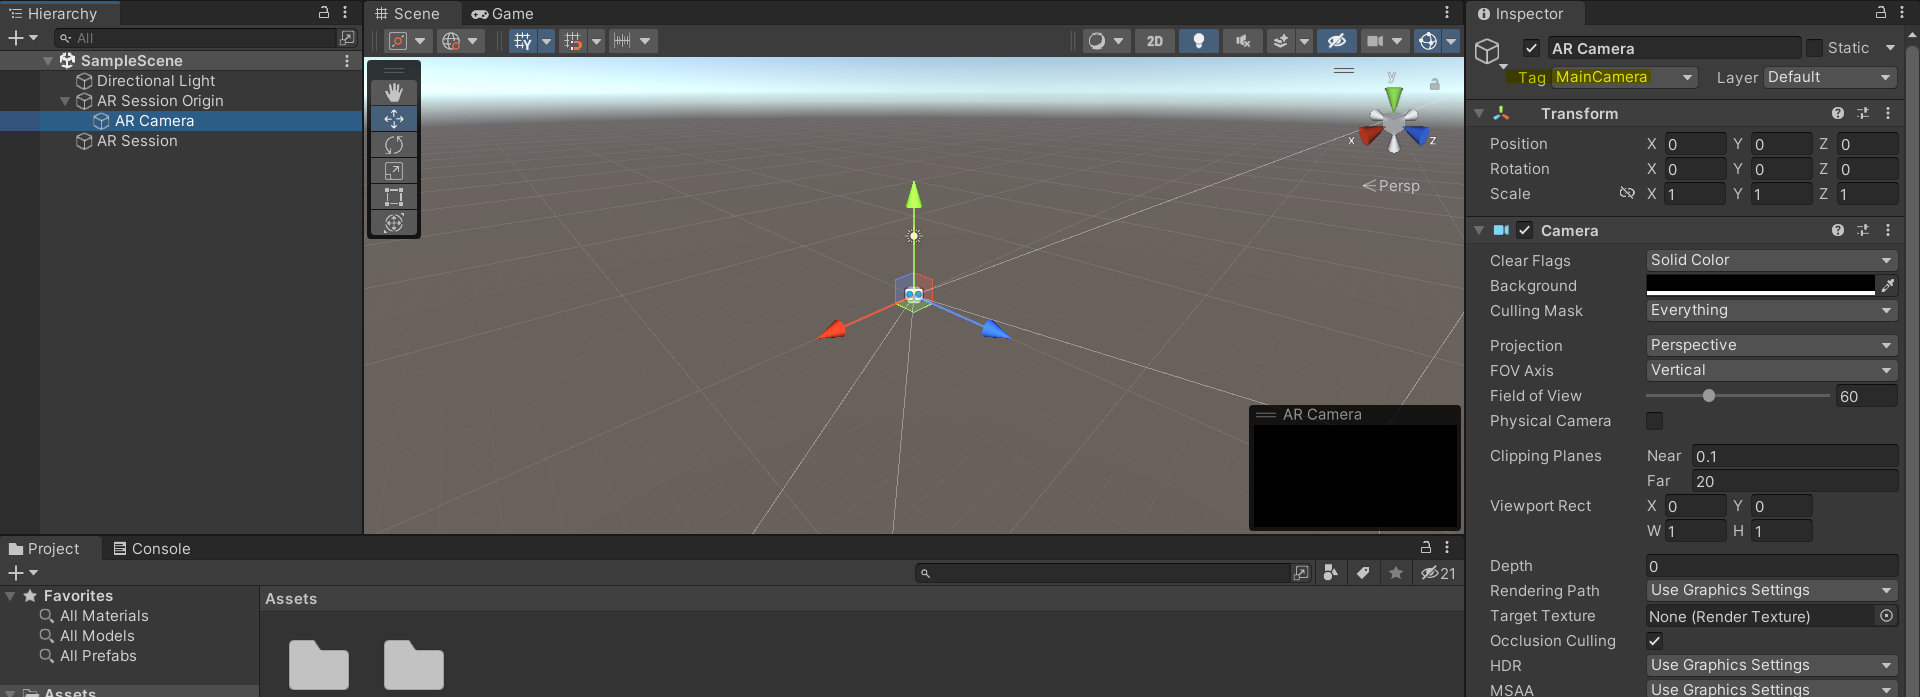
Also make sure that inside the AR Session Origin object there is the AR Camera object and that the object tag is MainCamera
Prepare the AR Session Origin component for Tracking
The next step is to add a library of images for tracking, to do this ** click on AR Session Origin -> Add Component -> search for image, and click on AR Tracked Image **
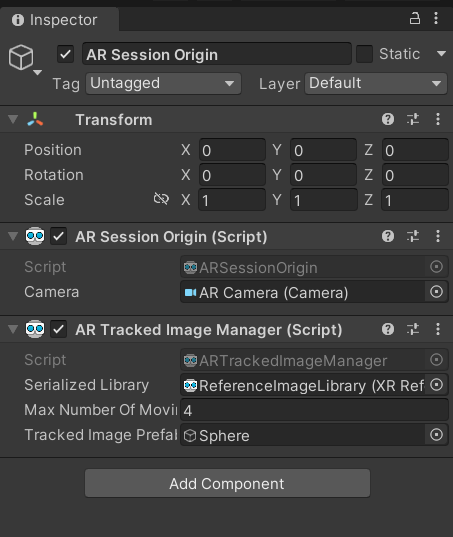
Now in the AR Session Origin object there is also AR Tracked Image Manager, where:
- Reference Library: refers to the collection of images that our application will use for detection;
- Max Number Of Moving Object: indicates the number of moving images to be monitored at the same time, the more images will be selected, the higher the CPU consumption will be;
- Tracked Image Prefab: This prefab allows you to create an instance each time an image is detected from the reference image library.
To learn more about the AR Tracked Image Manager, you will find links to the sources and official documentation at the end of the article.
Create the image library to be traced
On the project asset right click -> Create -> XR-> Reference Image Library, you can leave the name used by default. At this point, import any image into your project, sometimes with images that have an uppercase name there could be problems, make sure the images are in the following format: pinco.png, pallino.jpg.
From the Inspector of the ReferenceImageLibrary object, click on the Select button in the image square for the 2D Texture and select the image just imported into the project asset.
At this point, by checking the Specify Size checkbox you can change the dimensions, those of the texture take them automatically while the physical ones defined in meters are set by the user, you can enter 0.2 to the x axis and 0.2 to the y axis (Unity set aspect ratio of the image automatically).
The Keep Texture at Runtime option ensures that the image is loaded at runtime and therefore that there are no loading problems on our device.
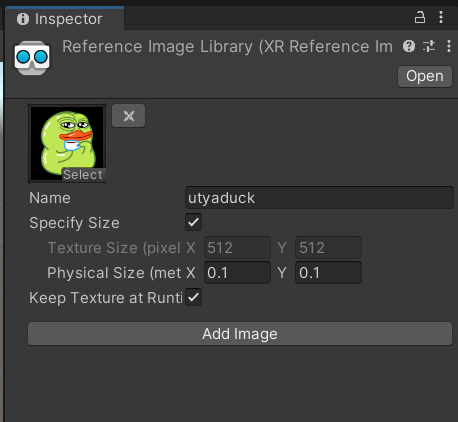
You can add other image with Add Image button.
Set up tracking with image library
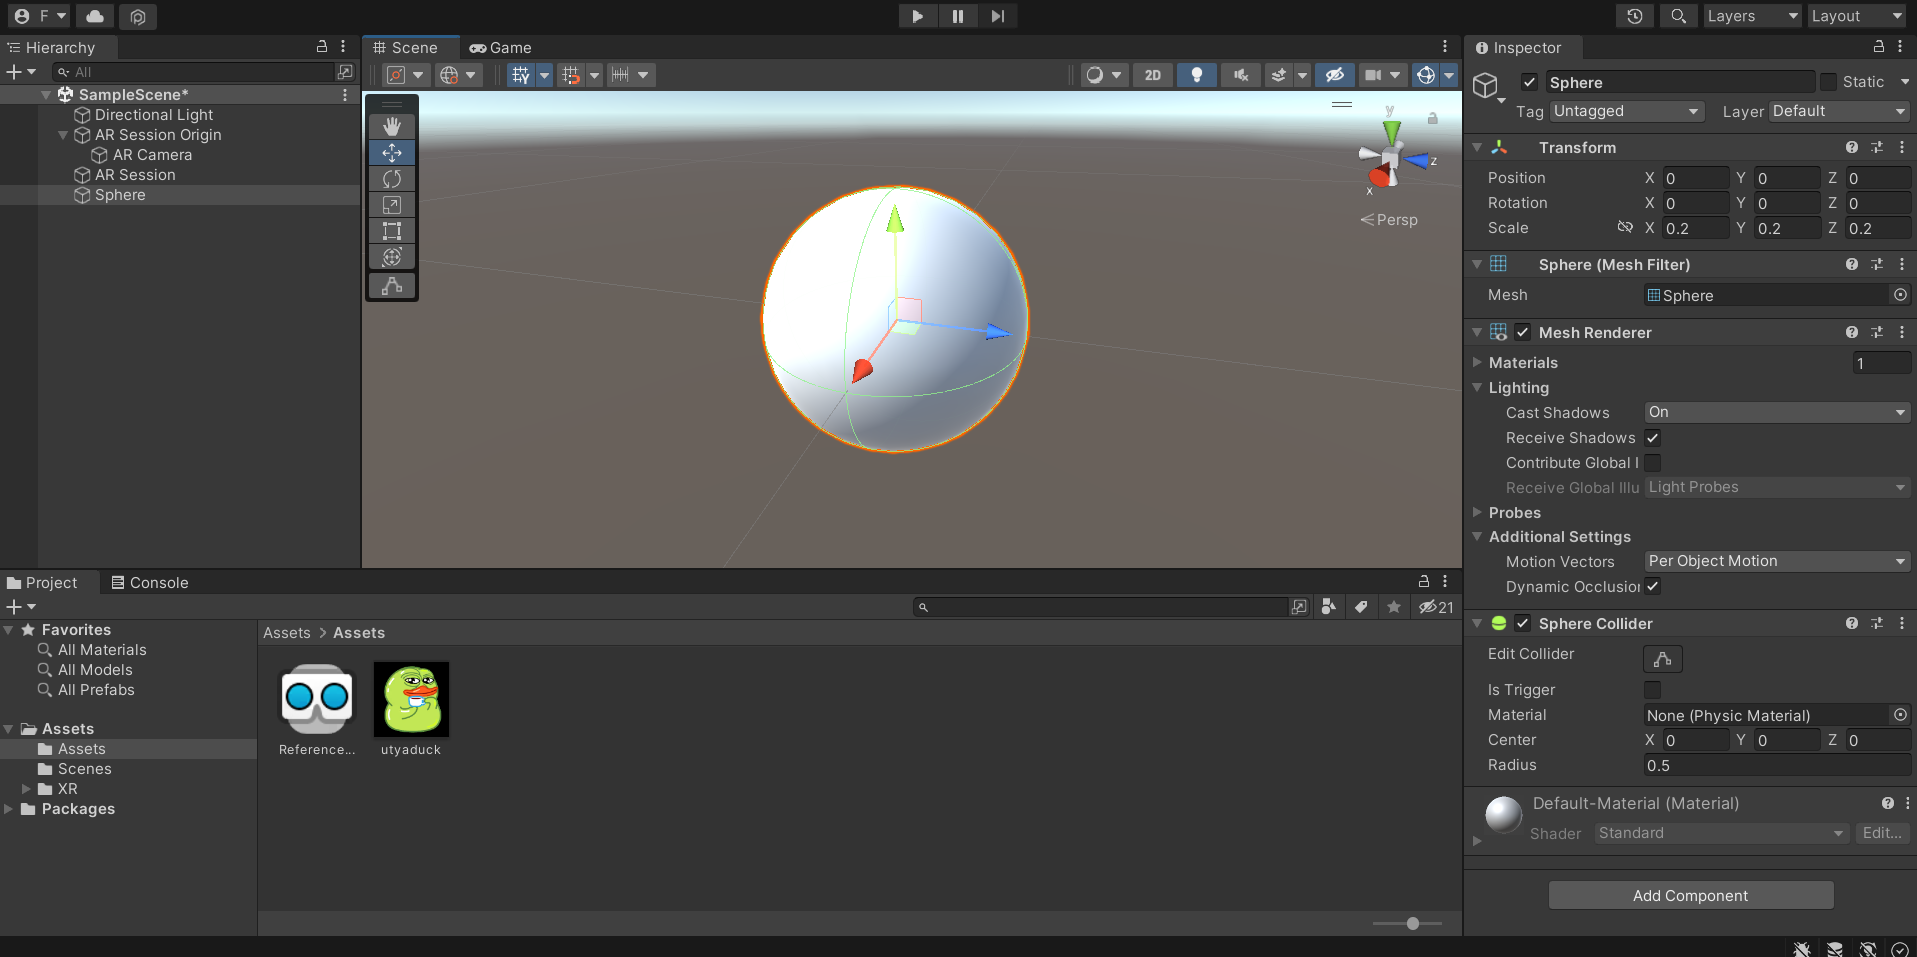
To configure our AR scene with the newly created image library, select the AR Session Origin object and from the inspector enter the image library in the Reference Library field. In the Max Number Of Moving Object field you can enter any value, 4 is the right trade off between performance and effectiveness of the application. At this point, a prefab must be added to the image to be traced in the Tracked Image Prefab field, to do this we create a simple 3D object: click on the GameObject menu -> 3D Object -> Sphere, Reduce the size of the sphere to 0.1, from the inspector on the scale value we set a value of 0.2 on all 3 axes and we set the position from the position field to 0.
At this point from the inspector of the AR Session Origin object we can insert the sphere just created in the Tracked Image Prefab field.
Build & Run
If you have performed all the steps correctly you can now test the application on an android device.
Click on File -> Build And Run -> Click on Add Open Scene -> Click on Player Settings -> Click on XR Plug-in Management -> Enable ARCore. Then ARCore -> From Player Settings remove the check from Auto Graphics API, and remove Vulkan from ** Graphics APIs **. At this point, go back to the build screen and click on Build or Build And Run if you have an android device already connected and configured.
##Trobleshooting
- On the device the application starts but I see everything black -> In this case ARCore has not been correctly configured, check that you have enabled it in the Player Settings of the Build screen.
- Vulkan graphics API does not support ARCore error -> From Player Settings uncheck Auto Graphics API, and remove Vulkan from Graphics APIs.
- Error Missing ARM64 architecture which is required for Android 64-bit devices -> Not an error but just a project warning, a possible fix is Project Settings> Player> Other Settings> Scripting Backend ‘and select ARM64 in’ Project Settings> Player> Other Settings> Target Architectures> IL2CPP.
Source Code
You can find this project here: Github T1 - Tracking Image AR.
Source
Thank you ☺